Sunday, February 26, 2012

Orange You Glad We Made Scones?

They're [cran]berry good!


Cranberry Orange Scones
Recipe adapted from King Arthur Flour
Photos by Bake Yourself Happy

Cranberry Orange Scones

  • 1 3/4 cups whole wheat flour
  • 3 tablespoons sugar
  • 2 1/2 teaspoons baking powder
  • 1/2 teaspoon salt
  • 1/2 teaspoon allspice
  • 5 tablespoons unsalted butter, chilled, cut in pieces
  • 1/2 Craisins
  • 1/3 cup half and half
  • 1 heaping tablespoon orange juice
  • 1 large egg
  • 1 large orange peel, grated


Directions
This is what your butter-flour mixture should look like!
  1. SOAK the Craisins in warm water for a few minutes to remove excess sugar.  Set out to dry.
  2. PREHEAT oven to 425 F and lightly grease a baking sheet.  We used a scone pan, which was way awesome to use!
  3. COMBINE flour, sugar, baking powder, salt, and allspice in a medium mixing bowl.
  4. ADD butter pieces and mix until you have a very grainy mixture.  The mixture should not be smooth.
  5. STIR in the cranberries.
  6. COMBINE half and half, orange juice, egg, and grated orange peel in a separate bowl.  Once mixed, add to the flour mixture until dough is smooth.
  7. FLOUR a work surface and turn dough onto surface.  
  8. KNEAD the dough a few times, then form into an 8" circle that is roughly 1/2" thick.
  9. PLACE the dough on the baking sheet, and cut into 8-10 wedges, depending on how many (and how big) you want the scones to be.  Separate slightly.
  10. BAKE for 10-15 minutes.  You will want to check them at 10 minutes, then every minute or so if they are not yet done.  You'll know they are done when the kitchen smells incredible and a toothpick comes out clean when inserted.
  11. REMOVE from the baking sheet immediately, and enjoy!

Thursday, February 16, 2012

Slap Yo' Momma Shrimp Po' Boy

This Southern-inspired sandwich is so good you'll want to slap yo' momma - but don't.  Inviter her over for dinner instead!


Cajun Pan-Seared Shrimp Po' Boys with Remoulade Sauce
Recipe by Bake Yourself Happy and adapted from food.com (Rita~)
Photos by Bake Yourself Happy


Remoulade Sauce

  • 3/4 cup plain yogurt
  • 1 1/2 tablespoon yellow mustard
  • 1 1/2 tablespoon ketchup
  • 3/4 tablespoon lemon juice
  • 3/4 tablespoon Worcestershire sauce
  • 4 scallions, chopped
  • 1/4 cup fresh parsley, chopped
  • 1 stalk celery, chopped
  • 1 clove garlic, minced
  • 1/4 teaspoon paprika
  • 1 1/2 teaspoon hot sauce
  • 1/4 teaspoon ground black pepper
  • *Note - this made enough for five sandwiches with plenty left over.  It's good sauce, so you'll probably use it on other food.  If not, you'll want to consider scaling down the recipe.


Cajun Pan-Seared Shrimp Po' Boys
  • 2 tablespoons remoulade sauce (above)
  • 3/4 lb medium shrimp, thawed, deveined and shelled
  • 1 tablespoon olive oil
  • 1 1/2 tablespoon cajun spice
  • Lettuce
  • Tomato, sliced
  • Whole wheat hoagie rolls (we used hot dog buns!)

Directions
  1. COMBINE yogurt, mustard, ketchup, lemon juice, Worcestershire sauce, scallions, parsley, celery, garlic, paprika, hot sauce, and black pepper in a medium mixing bowl.
  2. STIR until well blended.  Place in refrigerator for about 60 minutes.
  3. SET oven to broil.
  4. COMBINE shrimp and cajun spices in a medium bowl.
  5. PLACE rolls on a baking sheet, insides facing up.  Put in oven until lightly toasted and crisp.
  6. SPREAD olive oil in a large skillet.
  7. COOK shrimp on medium high.  Shrimp should all touch the skillet to ensure even cooking, and will cook about two minutes per side.  You'll know they are done when they turn from opaque white to solid white, and can test but cutting one open.  The middle will be solid white.
  8. SPREAD 2 tablespoons of remoulade sauce on each roll.
  9. TOP with lettuce and tomato slices.
  10. ADD shrimp, and enjoy!


Saturday, February 11, 2012

It's Peanut Butter Noodle Time!

Warning: these Thai-style peanut butter noodles will kick


We received a jar of Hot 'n Spicy Peanut Butter from Krema Nut Company (via The Sister's Sweet Shop in Dublin) and wanted to make something delicious with it.  We decided upon this Thai-style pasta dish, and were very pleased with the result.  The Hot 'n Spicy Peanut Butter was a great touch - adding just enough kick to make you smile.  Well done, Krema - we loved your peanut butter!


Thai-Style Peanut Noodles
Recipe adapted from 101cookbooks.com
Photos by Bake Yourself Happy

Thai-Style Peanut Noodles

  • 1 8oz package soba noodles
  • 1 bunch asparagus spears, cut into 1/2" segments
  • 1/4 cup Hot 'n Spicy Krema Peanut Butter
  • 1/2 cup peanut butter (we used Krema creamy peanut butter)
  • 1/4 cup brown rice vinegar
  • 2 cloves garlic, minced
  • Crushed red pepper flakes


Directions
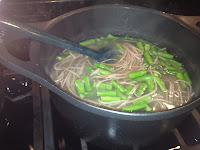
  1. BOIL soba noodles per package instructions.  In the last minute of boiling, add the cut asparagus.
  2. DRAIN noodles and asparagus, then run under cold water for about a minute to stop the cooking.
  3. COMBINE the peanut butter, rice vinegar, and garlic in a separate bowl.
  4. ADD hot water a little bit at a time until the peanut sauce reaches your desired texture.  We recommend a consistency that is slightly thicker than yogurt.
  5. TASTE the sauce and add red pepper flakes and salt as desired.
  6. POUR the sauce over the noodles and toss well, until all noodles are evenly coated.
  7. ADD any proteins you may want - we recommend boiled chicken, but tofu is a popular option as well.  The protein will be just as good on the side, if you'd rather not combine it with the noodles!
  8. GARNISH with scallions and/or peanuts and enjoy!


Saturday, February 4, 2012

We Made Ourselves Some Dang Quesadillas...

...and we're pretty sure Napoleon and Kip would approve.


Breakfast Quesadillas
Recipe and photos by Bake Yourself Happy

Breakfast Quesadillas

  • *Note - this yields one quesadilla
  • 2 small 4" corn (or flour) tortillas
  • 1 egg
1 slice turkey bacon
2-4 leaves spinach
2-3 grape tomatoes
Sharp cheddar cheese
Cilantro
Salsa

Directions
  1. SCRAMBLE the egg.  You will likely want to mix a little milk in when scrambling.
  2. COOK the bacon.  Crispier bacon will work better, but cook to your taste.
  3. SLICE tomatoes in half.
  4. HEAT a skillet or panini maker to medium-high heat.
  5. PLACE one tortilla on the skillet or panini maker.
  6. SCOOP the scrambled egg onto the tortilla.  Crumble the bacon on the egg.
  7. TOP the bacon and eggs with the tomatoes.  
  8. SPRINKLE cheese on top of the tomatoes, then top with the other tortilla.
  9. COOK until bottom tortilla is lightly browned (or to your liking), roughly 4 minutes.  If you are using a skillet, you will need to flip the quesadilla at this point to cook the other side.
  10. REMOVE from skillet and place the cheesy tortilla down on a plate.  Lift the other tortilla and add spinach and cilantro.
  11. SERVE with a side of salsa, and enjoy! 


Wednesday, February 1, 2012

Chocolate Roulade with Peppermint Cream Cheese Icing

We made this for the holidays, but it's a treat you can enjoy anytime!

Chocolate Roulade with Peppermint Cream Cheese Icing
Recipe adapted from The Chocolate and Coffee Bible
Photos by Bake Yourself Happy

Chocolate Roulade

1/2 cup caster sugar* (superfine)
5 eggs, separated
1/2 cup cocoa powder

Peppermint Cream Cheese Icing
1 package (8oz) cream cheese, softened
1 cup powdered sugar
4 tablespoons butter, softened
2 teaspoons peppermint extract

Directions
  1. PREHEAT oven to 350F.  Place a piece of parchment paper in a 13x9 jelly roll pan.  Lightly grease the parchment paper.
  2. Lay a large sheet of parchment paper on the work surface and dust two tablespoons of caster sugar.
  3. PLACE the egg yolks in a heatproof bowl.  Add remaining caster sugar and mix until the mixture is thick enough to leave a trail.
  4. ADD cocoa to egg mixture and carefully fold in until well combined.
  5. WHISK the egg whites in a clean bowl until they form peaks.  This might take awhile, especially if done by hand!
  6. FOLD one tablespoon of the egg whites into the cocoa mixture to lighten it, then carefully fold in the rest.
  7. POUR the mixture into the jelly roll pan, taking it right to the corners.  Smooth so the mixture is evenly distributed.
  8. BAKE for 20-25 minutes, until well risen and springy.  A toothpick should come out clean when inserted into the middle.
  9. REMOVE from the jelly roll pan but keep the parchment paper on.  Allow to cool for 10-15 minutes, then roll up the roulade.
  10. COOL the roulade for at least one hour, and up to overnight.  
  11. BEAT cream cheese, powdered sugar and butter together until smooth.
  12. ADD peppermint extract a little at a time - its a strong flavor and two teaspoons might be too much according to your tastes!  We started with one teaspoon and gradually worked our way up, 1/4 teaspoon at a time.
  13. CAREFULLY unroll the roulade and spread icing.  Re-roll the roulade and place it in the refrigerator for at least one hour, then ENJOY!

*If you don't have caster sugar (or don't want to buy it), you can put regular sugar in a food processor.  Pulse for a few seconds until the sugar becomes very fine.  You'll want to wait a bit before you open the food processor - the caster sugar will be floating around and can make a mini sugar cloud!

We're working hard on whipping up some peaks!